SmartBiz – How to Set Up the Customer Portal
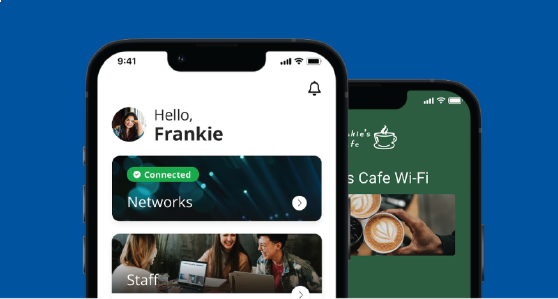
The SmartBiz Customer Portal is the digital gateway that puts network control directly into your hands. Designed for ease of use, the portal allows small business owners to manage their Wi-Fi services quickly and efficiently—without needing IT expertise.
Through a clean, intuitive interface, you can customize your guest Wi-Fi with your own branding, set access schedules, apply content filters, and monitor connected devices in real time. Whether you’re welcoming customers with a branded login page or ensuring secure internet access for your staff, the SmartBiz Customer Portal gives you the tools to deliver a seamless, secure online experience—all from one convenient dashboard.
Take control of your business connectivity with a portal built to work as hard as you do.
Getting Started
Let’s first get the portal enabled:
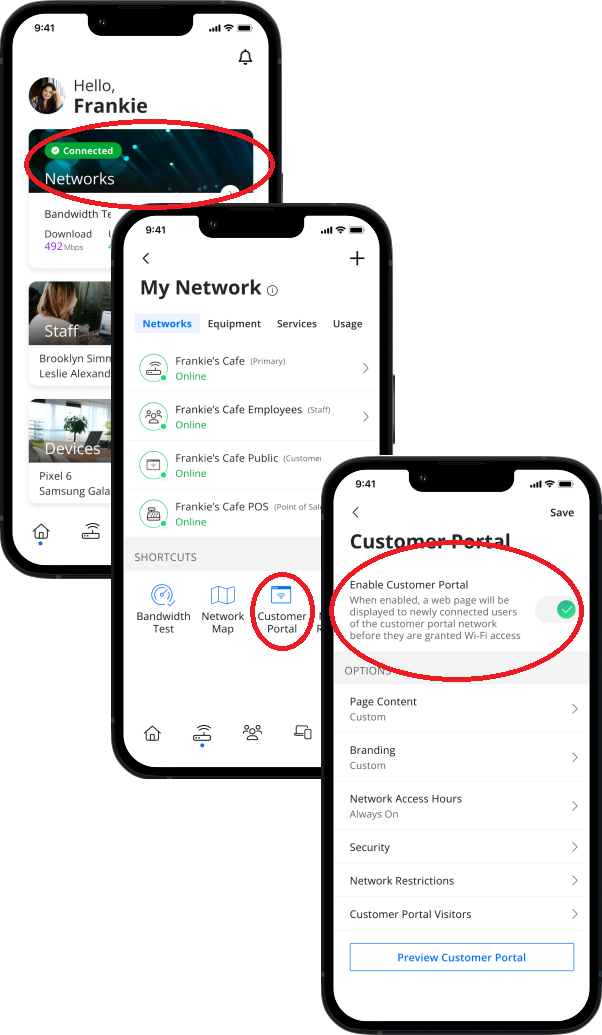
- From the Command Worxs home screen tap on “Networks”
- On the My Network page find “Customer Portal” in the Shortcuts section and tap it
- Tap the “Enable Customer Portal” toggle. It will turn green. Congrats! Your portal is active.
- Continue to customize your portal
Page Content
Use the Page Content to add a network name and page heading, add a cover photo, link your terms of service, and configure button text. You can also enable marketing opt-in consent.
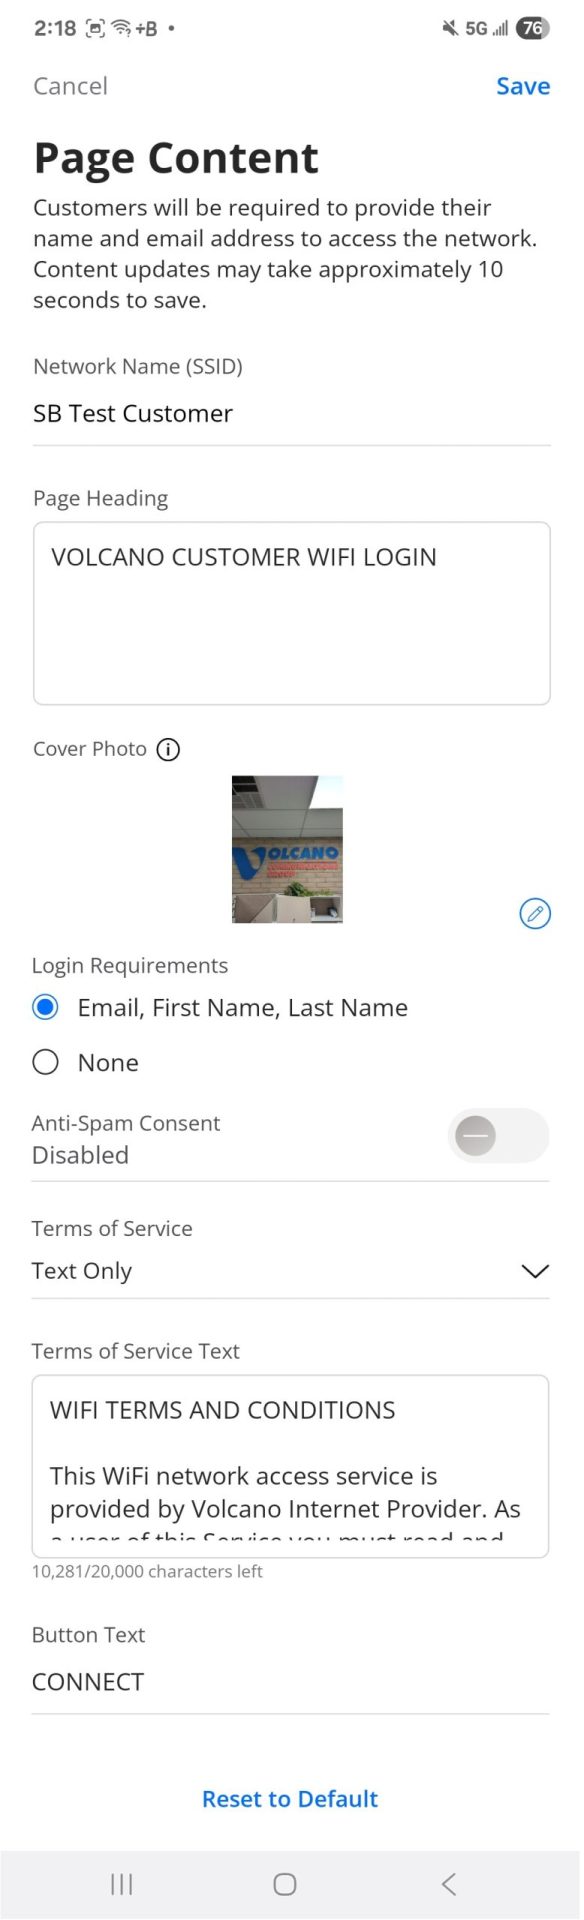
- Tap ‘Page Content’ from the Customer Portal page
- Enter a Network Name (SSID) – This can be a friendly name such as “The Snack Shack” or more technical “SS-Cust-01″
- Enter a page heading
- Tap Upload and select your cover photo for the portal. This will be displayed after customers select your WiFi network
- Select either to collect marketing information or not. This includes eMail, First and Last Name. Selecting ‘None’ will not collect any information
- When enabled you may use the ‘Anti-Spam Consent’ drop down to select the consent type – web or text
- Enter the web url if weblink was selected above or the text you’d like sent
- Select to show terms of service either by a web link or text
- Depending upon the selection above enter the url of the web page or enter the terms of service as text. There is a sample provided as a starting point.
- Change the Button Text if desired
- Tap ‘Save’ located in the top right corner
Branding
Use the following instructions to upload your business logo and select background and font colors to provide customers a lasting image of your company.
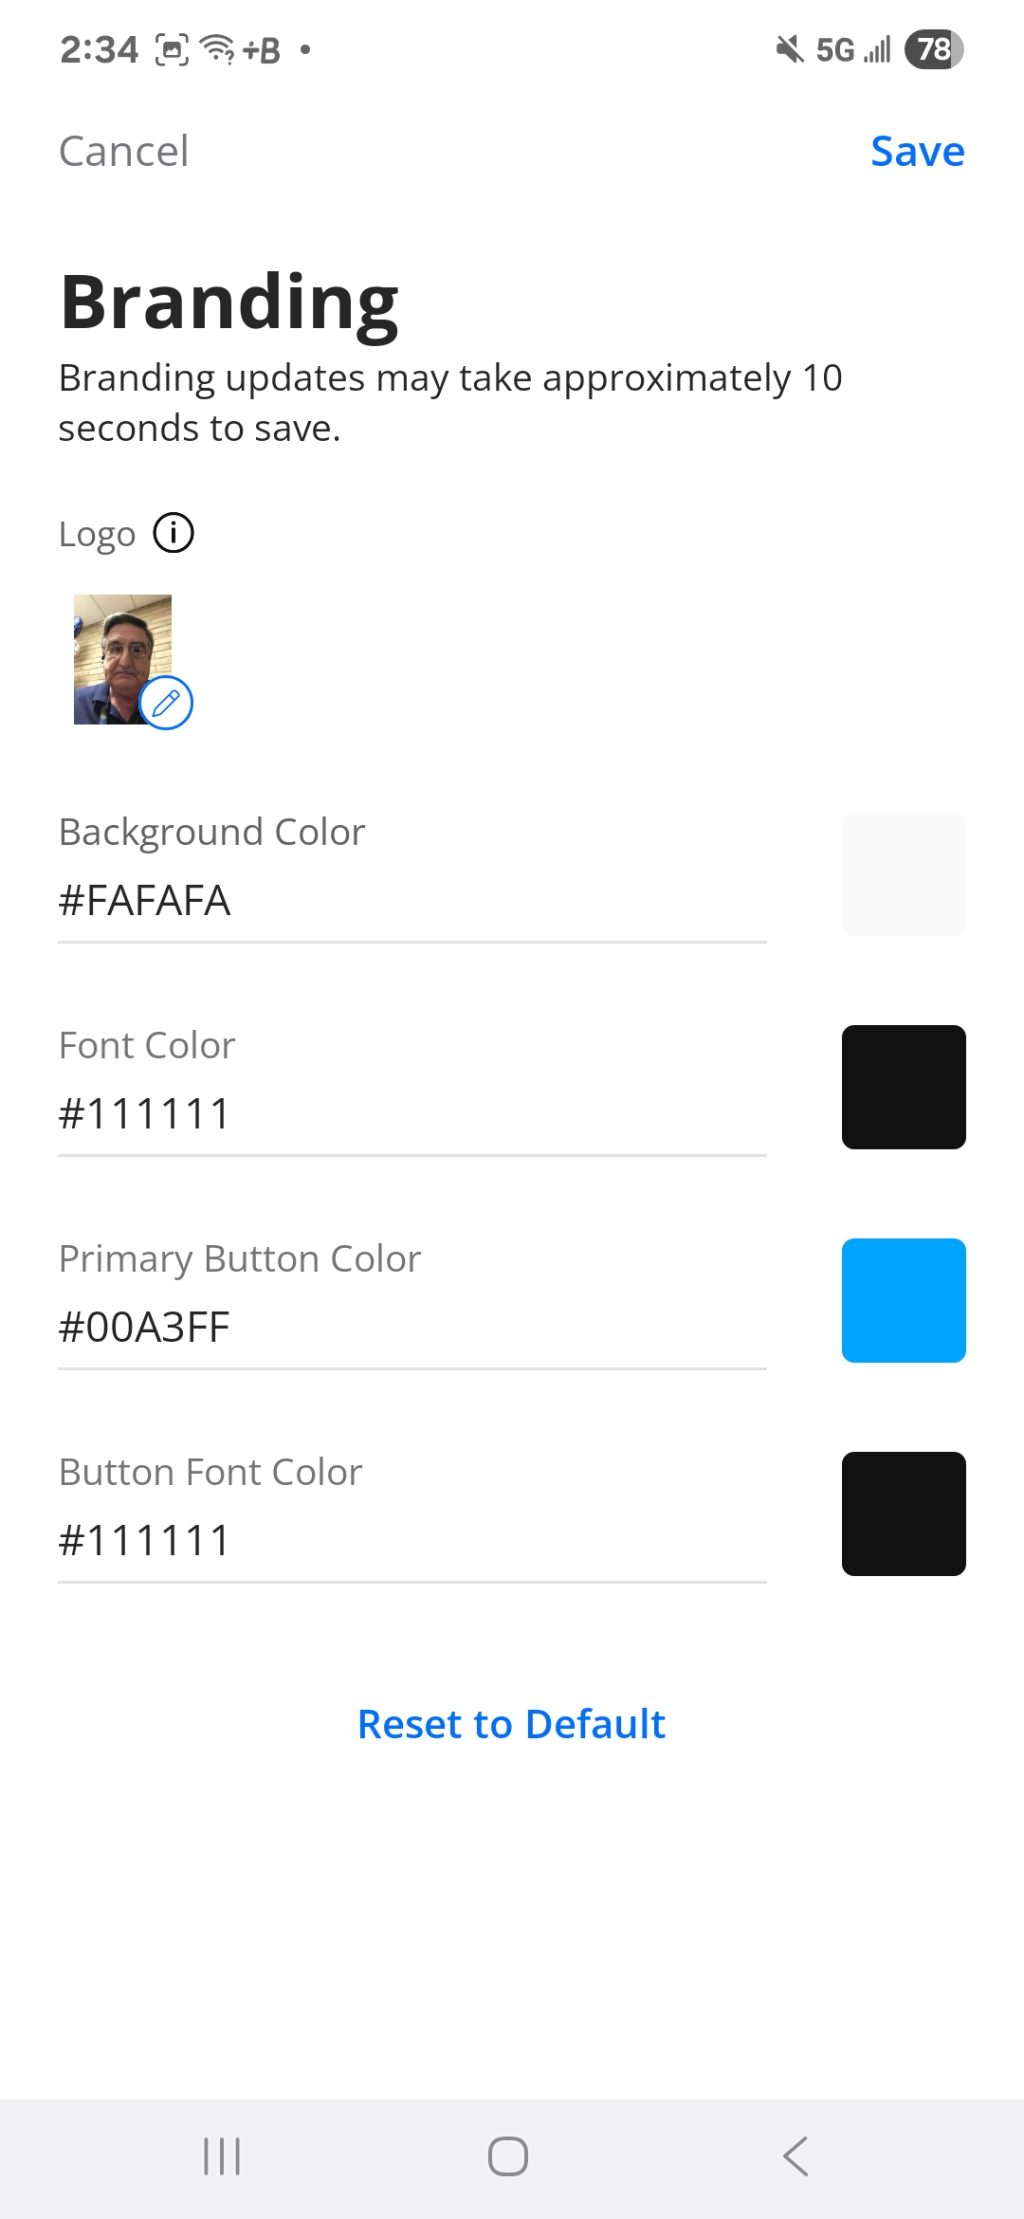
- Tap ‘Branding’ from the ‘Customer Portal’ page
- Tap the logo to upload your logo image
- Enter a Background Color hex code, or tap the color block to select a color
- Enter a Font Color hex code or tap the color block to select a color
- Enter a Primary Button Color hex code or tap the color block to select a color
- Enter a Button Font Color hex code or tap the color block to select a color
- Tap ‘Save’ at the top right corner
Network Access Hours
Maintain control of your network usage by managing the periods of time that your customers can utilize the WiFi connection
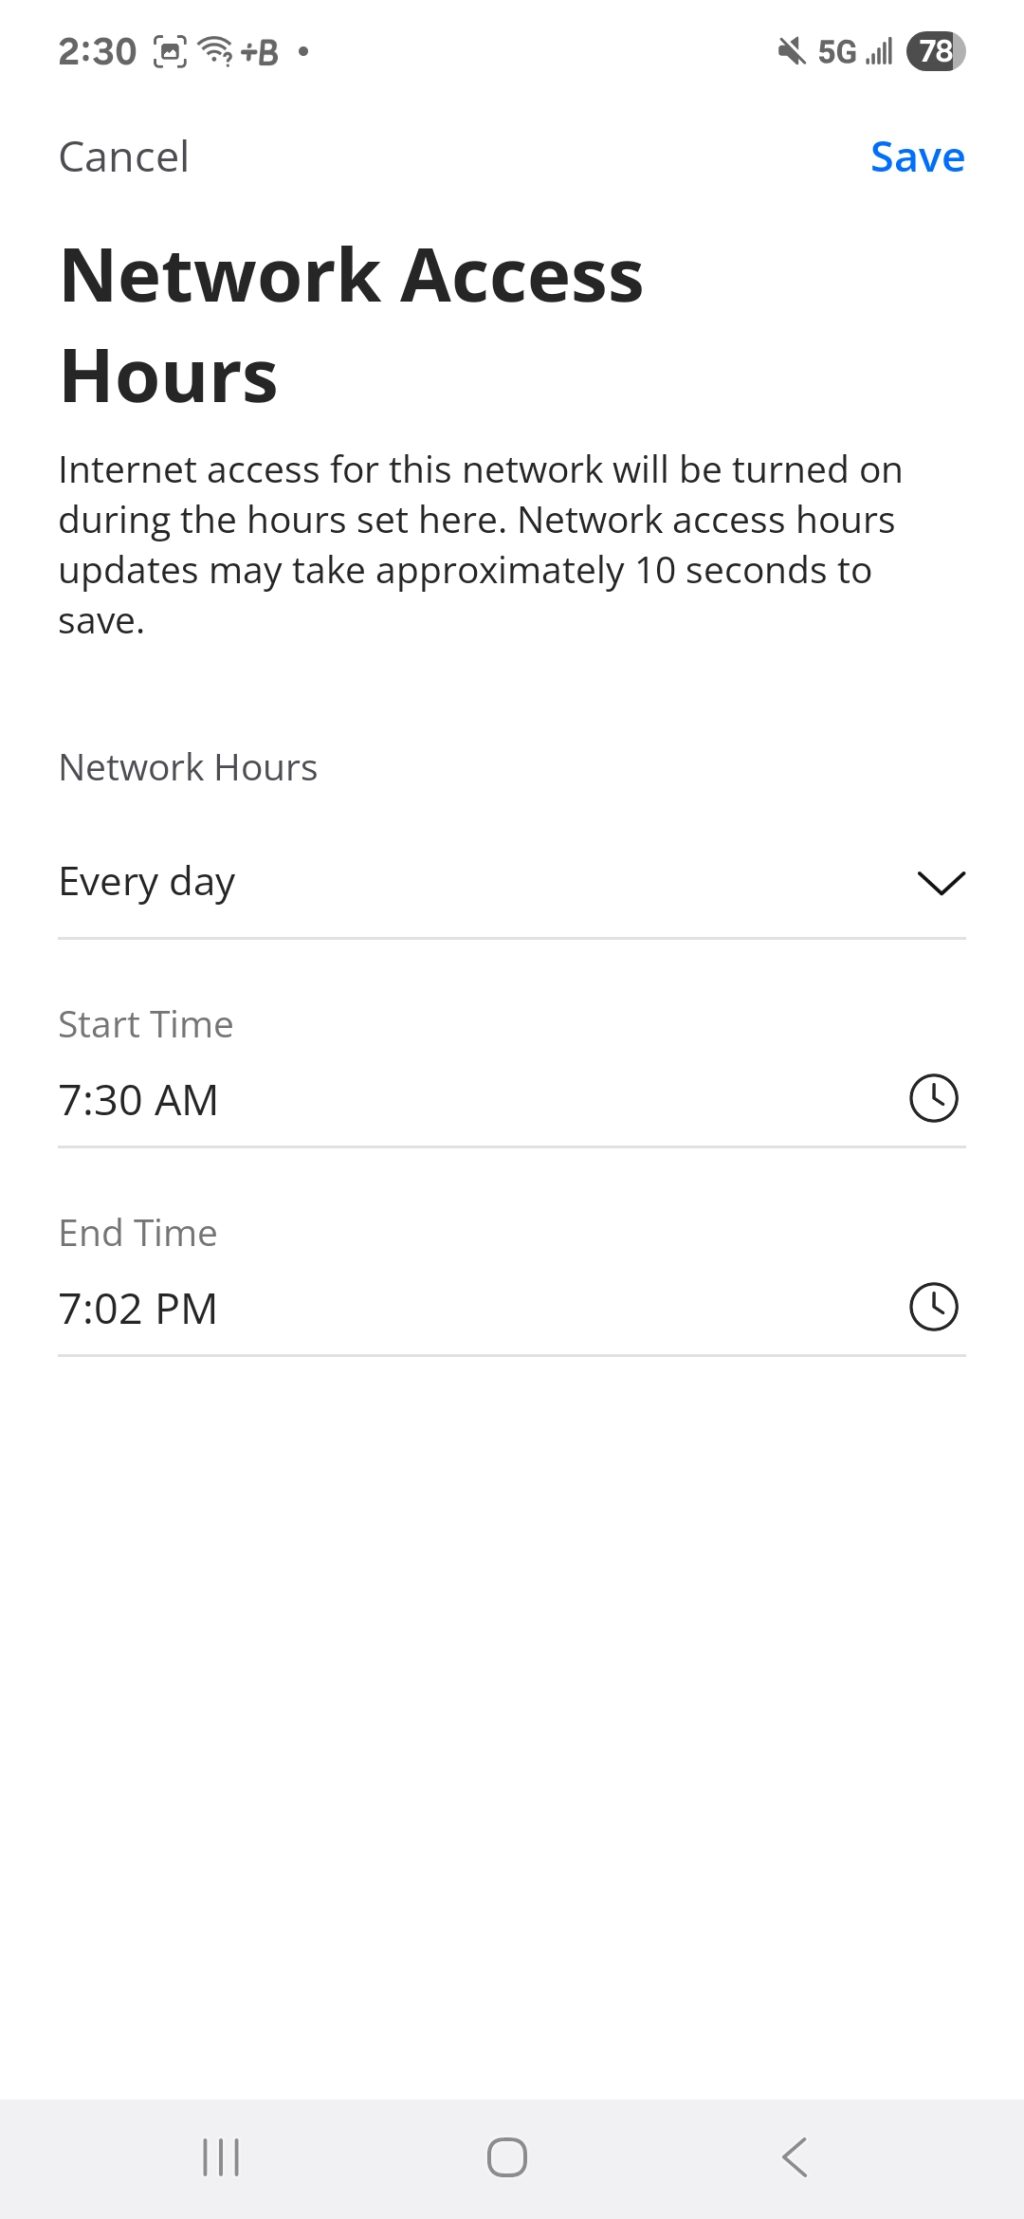
- Tap ‘Network Access Hours’ from the Customer Portal page
- Tap the ‘Network Hours’ dropdown and select a schedule
- Always On: The network is always available
- Every Day: network is available for the same hours everyday
- Custom: network availability can be customized with a variety of time periods thoughout the week. If you choose this option you will set up times for everyday of the week.
- Tap ‘Save’ in the upper right corner
Network Security
The selections in this section allow turning off specific security protocols and should only be adjusted in limited cases and only when recommended by an IT specialist. The ‘Additional Details’ menu item shows uptime and the last time the settings were updated.
Content Restrictions
If you are looking to prevent certain types of customer activity SmartBiz provides a wide range of options.
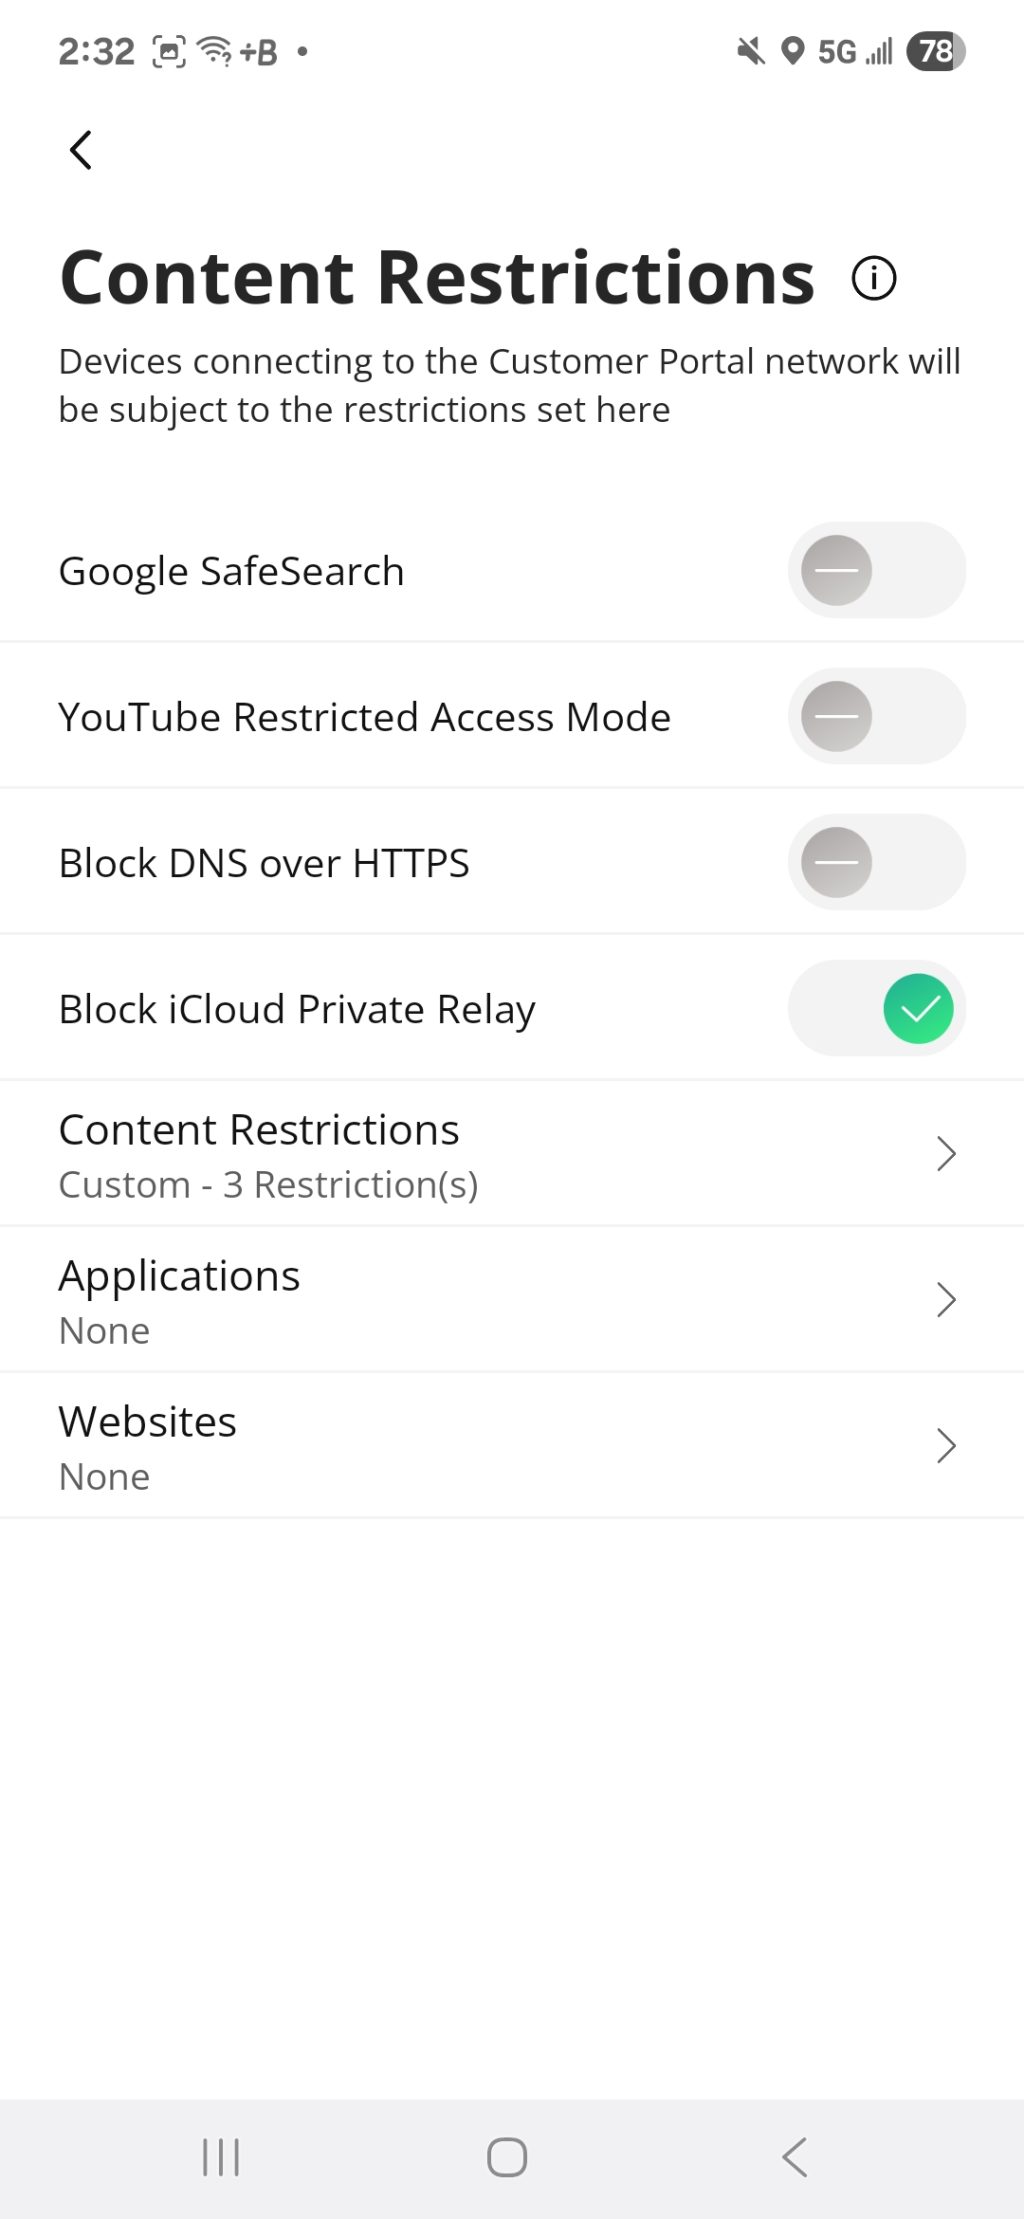
- Tap ‘Content Restrictions’ from the ‘Customer Portal’ page
- To force Google’s SafeSearch tap this toggle. It will turn green when active
- Tap ‘YouTube Restricted Access Mode’ to limit the types of video that can be accessed
- Tap ‘Block DNS over HTTPS’ to prevent device information from being broadcast over the internet
- Tap ‘Block iCloud Private Relay’ to prevent Apple from sending device IP and to provide encrypting of internet traffic
- Tap on ‘Content Restrictions’ to setup blocking of types of internet traffic such as adult sites, gambling, violence, etc.
- Tap the category you wish to restrict traffic to. A lock will appear on categories that have been selected to restrict
- Tap on ‘Applications’ to prevent specific applications from running over your WiFi network
- Enter a search criteria and select the application you are looking to block
- Tap on ‘Websites’ to prevent accessing specific websites
Customer Portal Visitors
This customization allows for how long to retain customer records.
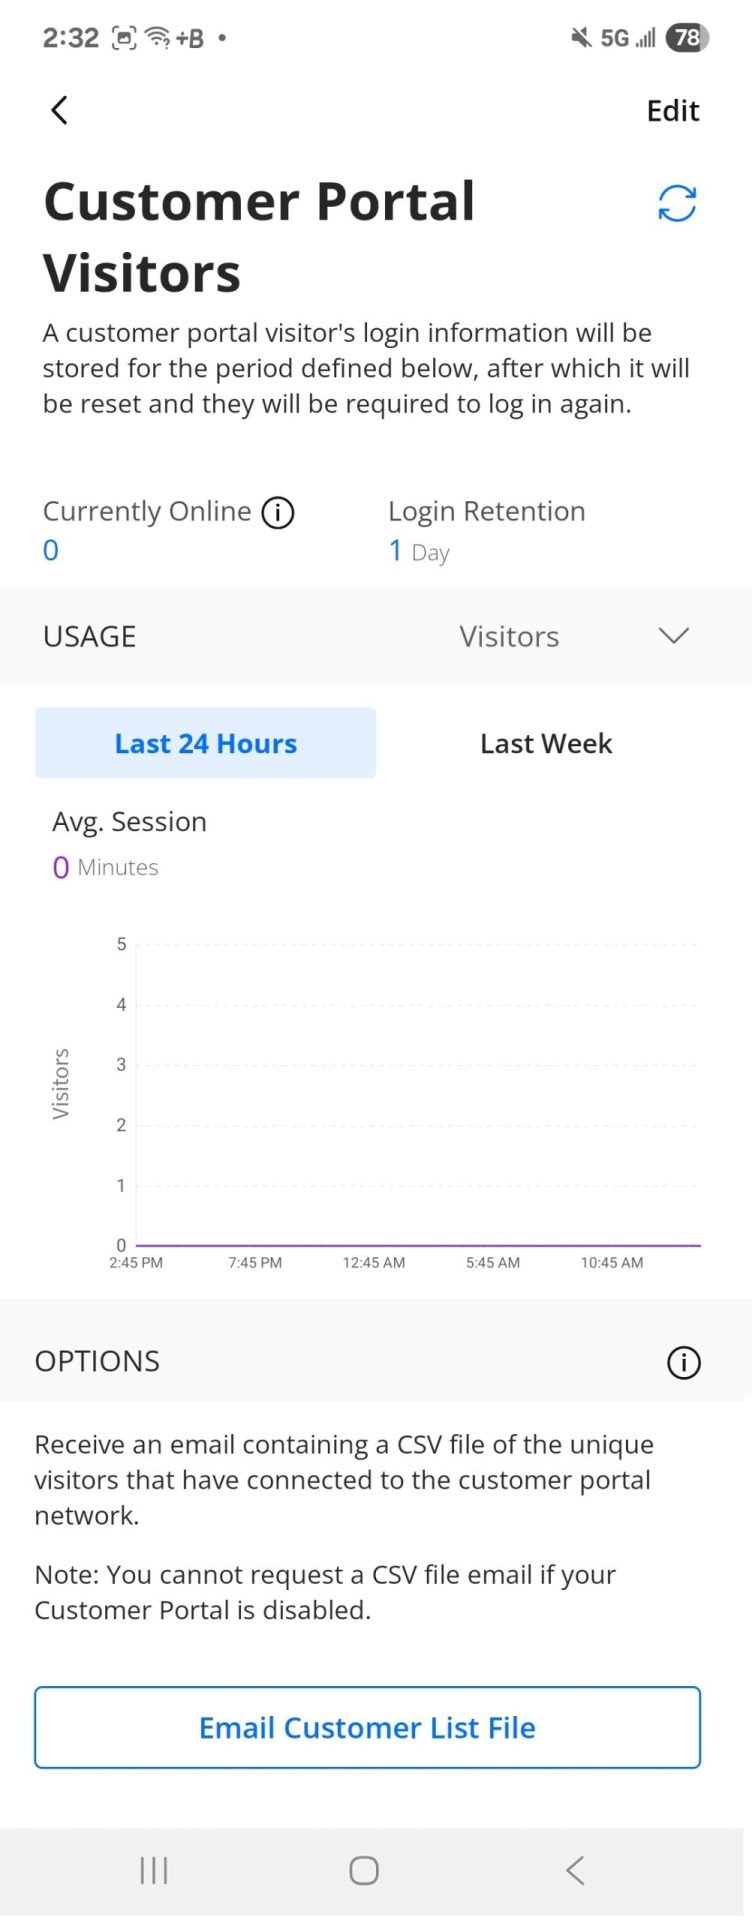
- Tap ‘Customer Portal Visitors’ from the ‘Customer Portal’ page
- At the top of the page is information on how many customers are currently on your network, current login retention, ability to view usage by number of visitors or data usage and a graph showing the history of that traffic for the past 24 hours and the week.
- To adjust your retention period tap ‘Edit’ in the top right of the page.
- Tap the ‘Login Retention’ dropdown and select a retention period
- Tap ‘Save’ located at the top right of the page
- To receive the Customer List File click ‘Email Customer List File’ button at the bottom of this page. The file will be emailed to the email address associated with CommandWorx.